Follow Me On Social Media!

Food Coloring Dyed Easter Eggs: Vibrant Colors Made Easy
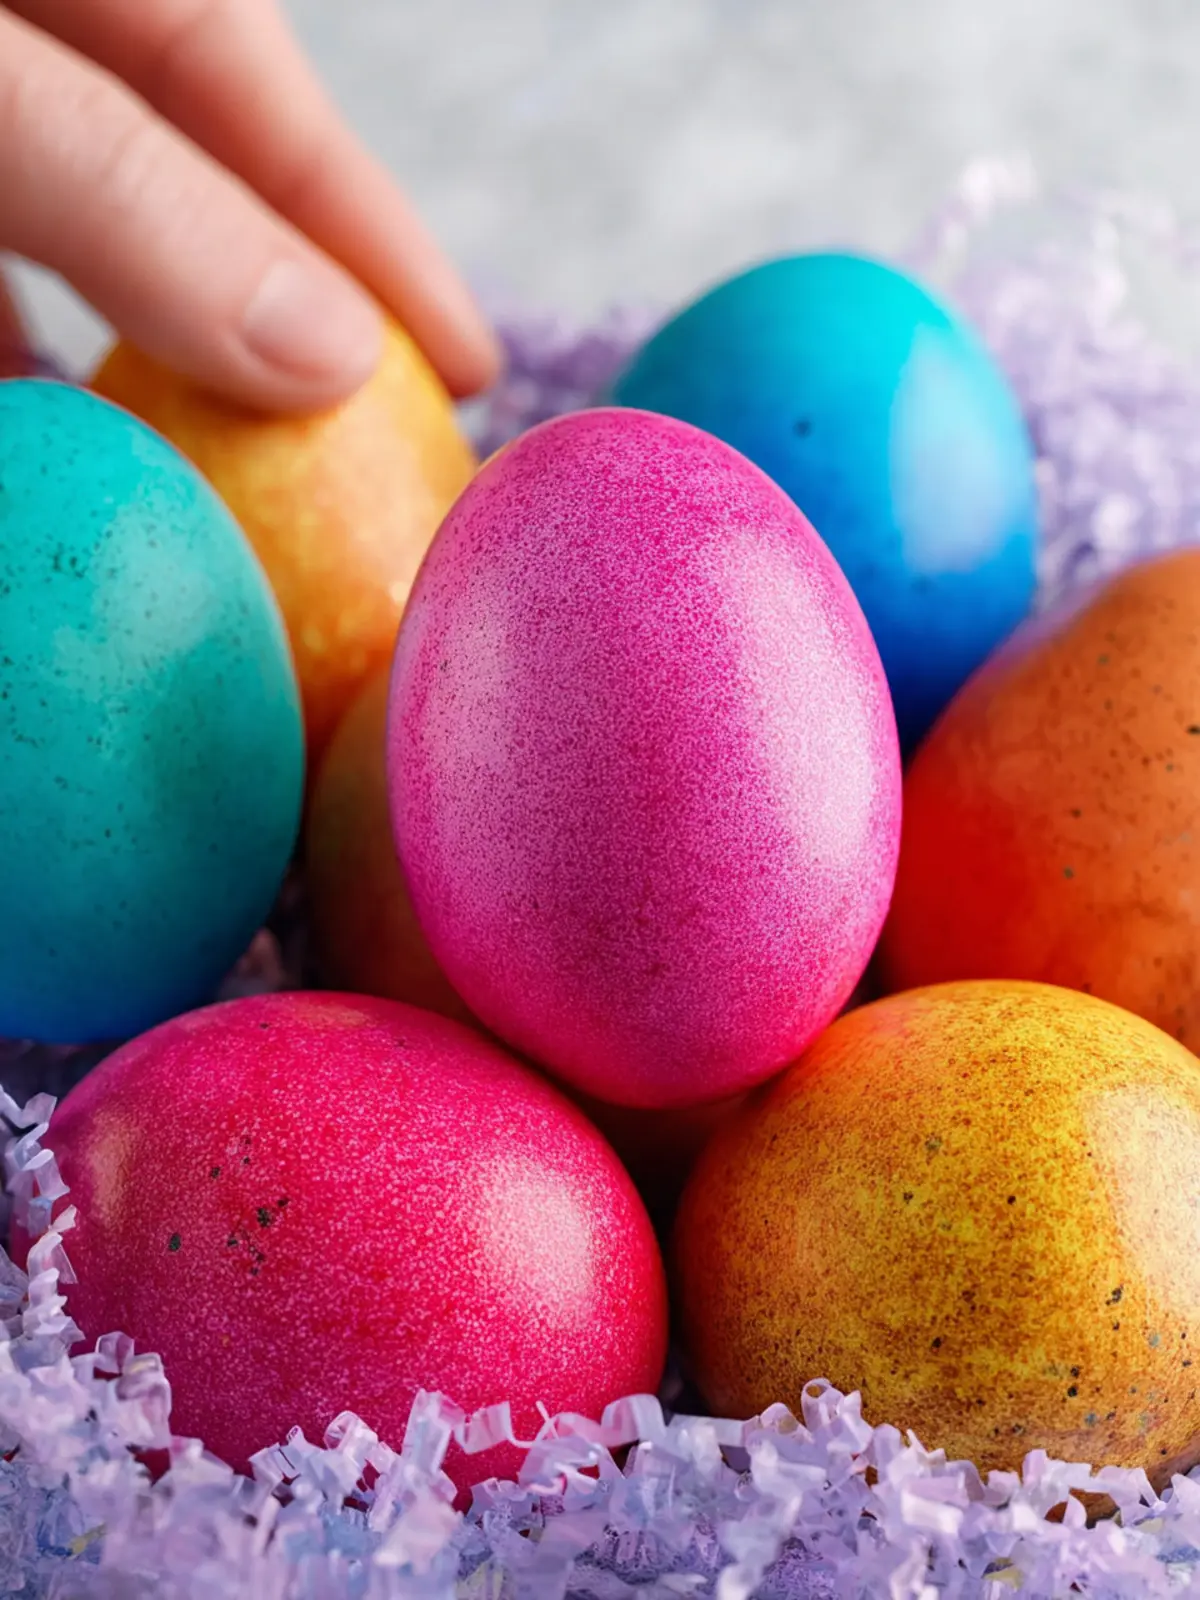
Introduction to Food Coloring Dyed Easter Eggs
Creating food coloring dyed Easter eggs is more than just a festive tradition; it’s an art form that invites creativity and brings joy to any household. Picture the scene: a table brimming with colorful bowls of dye, laughter filling the air, and the simple joy of spending time with family or friends as you transform plain eggs into vibrant works of art. These moments create a tactile, visual feast that embodies the spirit of Easter.
What makes food coloring dyed Easter eggs so special is not just the stunning colors but the memories created in the process. Each swirl of dye can evoke nostalgia, reminding many of their own childhood experiences of decorating eggs during the holiday. The excitement of dipping the eggs, watching the colors meld, and seeing the final result is a sensory experience that resonates with both young and old. The best part? It’s not just about the visual appeal; it’s also about the fun that unfolds as everyone shares tips and ideas, sparking creativity and laughter.
What makes Food Coloring Dyed Easter Eggs so special?
There are several reasons why food coloring dyed Easter eggs stand out:
-
Versatility: With just a few drops of food coloring mixed with water and vinegar, you have the power to create an infinite array of colors. Feel like experimenting with gradients or creating marble effects? The sky is the limit.
-
Accessibility: The ingredients required for dyeing eggs are simple and often found in most kitchens, making this an affordable project.
-
Family Bonding: Decorating eggs provides a wonderful opportunity for families to come together, laugh, and share their artistic talents. It’s one of those timeless activities that create lasting memories.
-
Eco-Friendly Options: For those looking to reduce their environmental footprint, natural dyes from vegetables, fruits, or spices can be used to achieve beautiful colors without synthetic ingredients.
-
Keepsake Potential: Beyond the temporary thrill of decorating, these eggs can become cherished keepsakes for years to come, serving as a reminder of joyful times spent together.
So gather your supplies, unleash your creativity, and embark on this delightful journey of transforming ordinary eggs into extraordinary symbols of spring and celebration!
Key Ingredients for Food Coloring Dyed Easter Eggs
To create food coloring dyed Easter eggs that are vibrant and festive, gathering a few essential ingredients can make all the difference.
-
Eggs: Begin with white eggs, as their smooth surfaces take dye better than brown eggs. Fresh eggs provide the best canvas for your colorful designs.
-
Food Coloring: Use liquid food coloring for straightforward mixing. You’ll need a variety of colors to be creative—think deep reds, blues, greens, and yellows.
-
Vinegar: This is a crucial component in the dyeing process. A few tablespoons mixed with water help the colors adhere nicely to the eggs, resulting in bright shades.
-
Water: A staple for diluting food coloring. Typically, a cup of water per color will work perfectly.
-
White Crayon: Consider keeping a white crayon on hand. You can write messages or draw designs that remain white after dyeing!
These ingredients combine to spark creativity and excitement as you prepare to dye Easter eggs. Make this tradition memorable by experimenting with colors and designs together!
Why You’ll Love Food Coloring Dyed Easter Eggs
Creating food coloring dyed Easter eggs is not just a tradition; it’s an experience filled with color, creativity, and a touch of magic. Remember the first time you watched the vibrant hues splash onto the eggshells? It’s a beautiful memory that can bring families together, making any Easter celebration feel special.
The Joy of Creativity
One of the best parts of dyeing Easter eggs is the endless possibilities for design. Each egg can become a unique canvas where your imagination runs wild. You can try different techniques, from dipping to painting, and use various patterns or themes to showcase your style. It’s a delightful way to express yourself and bond with loved ones.
A Timeless Tradition
Food coloring dyed Easter eggs is a straightforward process that anyone can enjoy. Kids, adults, and everyone in between can participate, fostering a sense of togetherness. Plus, the colors you choose can bring an extra flair to your Easter décor. Imagine a vibrant basket filled with beautifully colored eggs — it’s a feast for the eyes!
Family Fun
Gathering around the table to dye eggs brings back childhood memories and creates new ones. Sharing laughter and stories while creating something beautiful strengthens family bonds and creates lasting traditions. It’s an activity that promotes creativity, patience, and joy in the simple pleasures of life.
This simple yet profound activity makes food coloring dyed Easter eggs a beloved springtime ritual, ensuring your celebration is memorable and filled with laughter.
Variations of Food Coloring Dyed Easter Eggs
Different colors and patterns
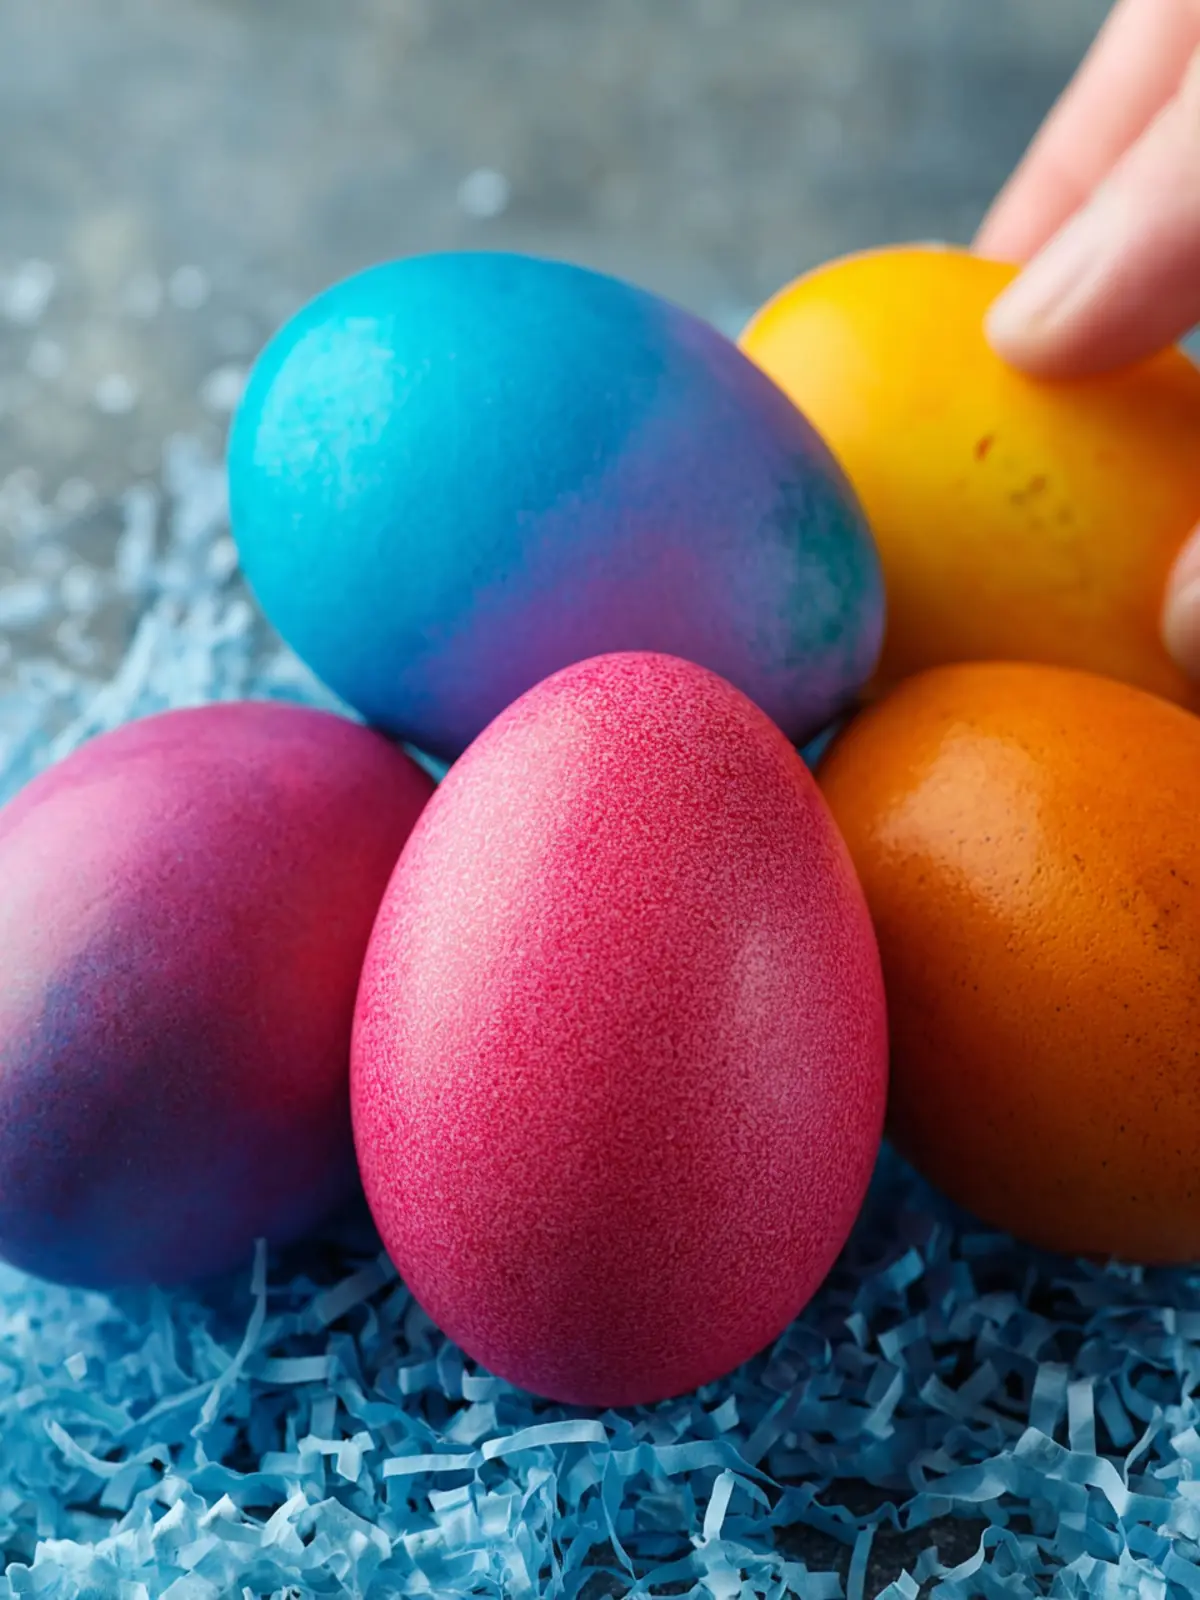
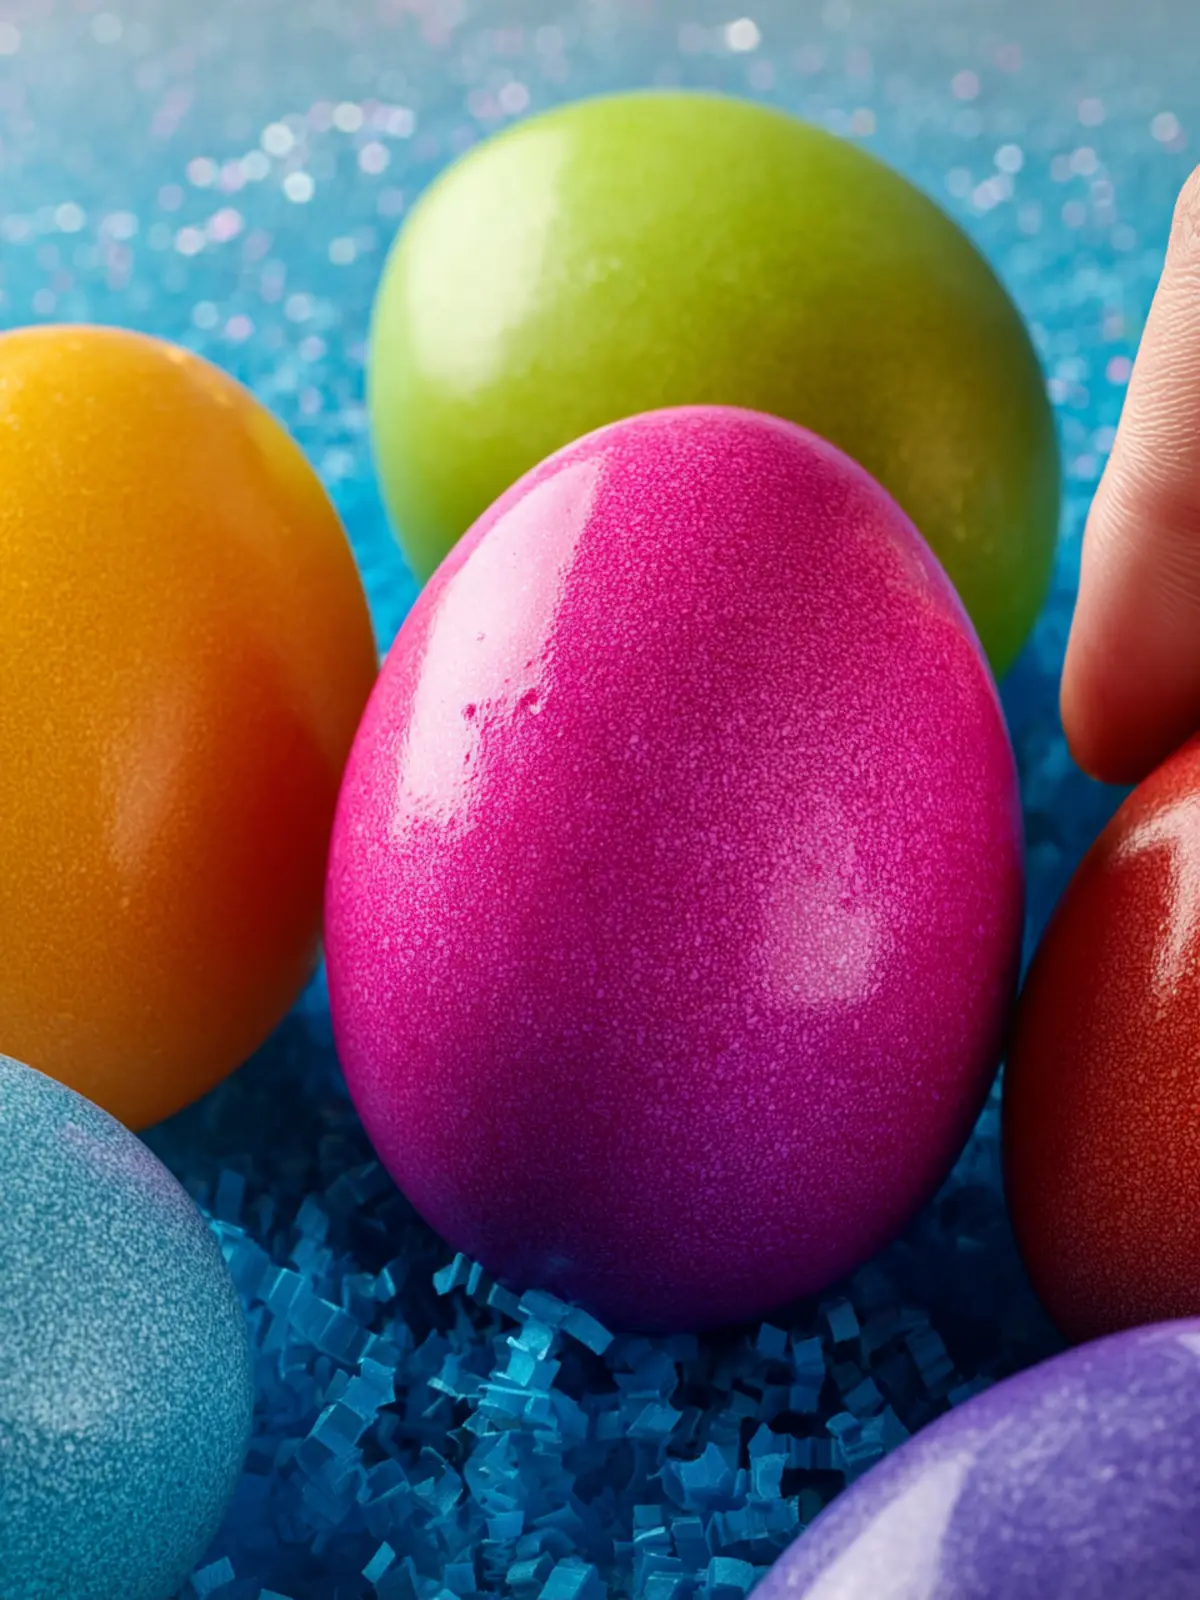
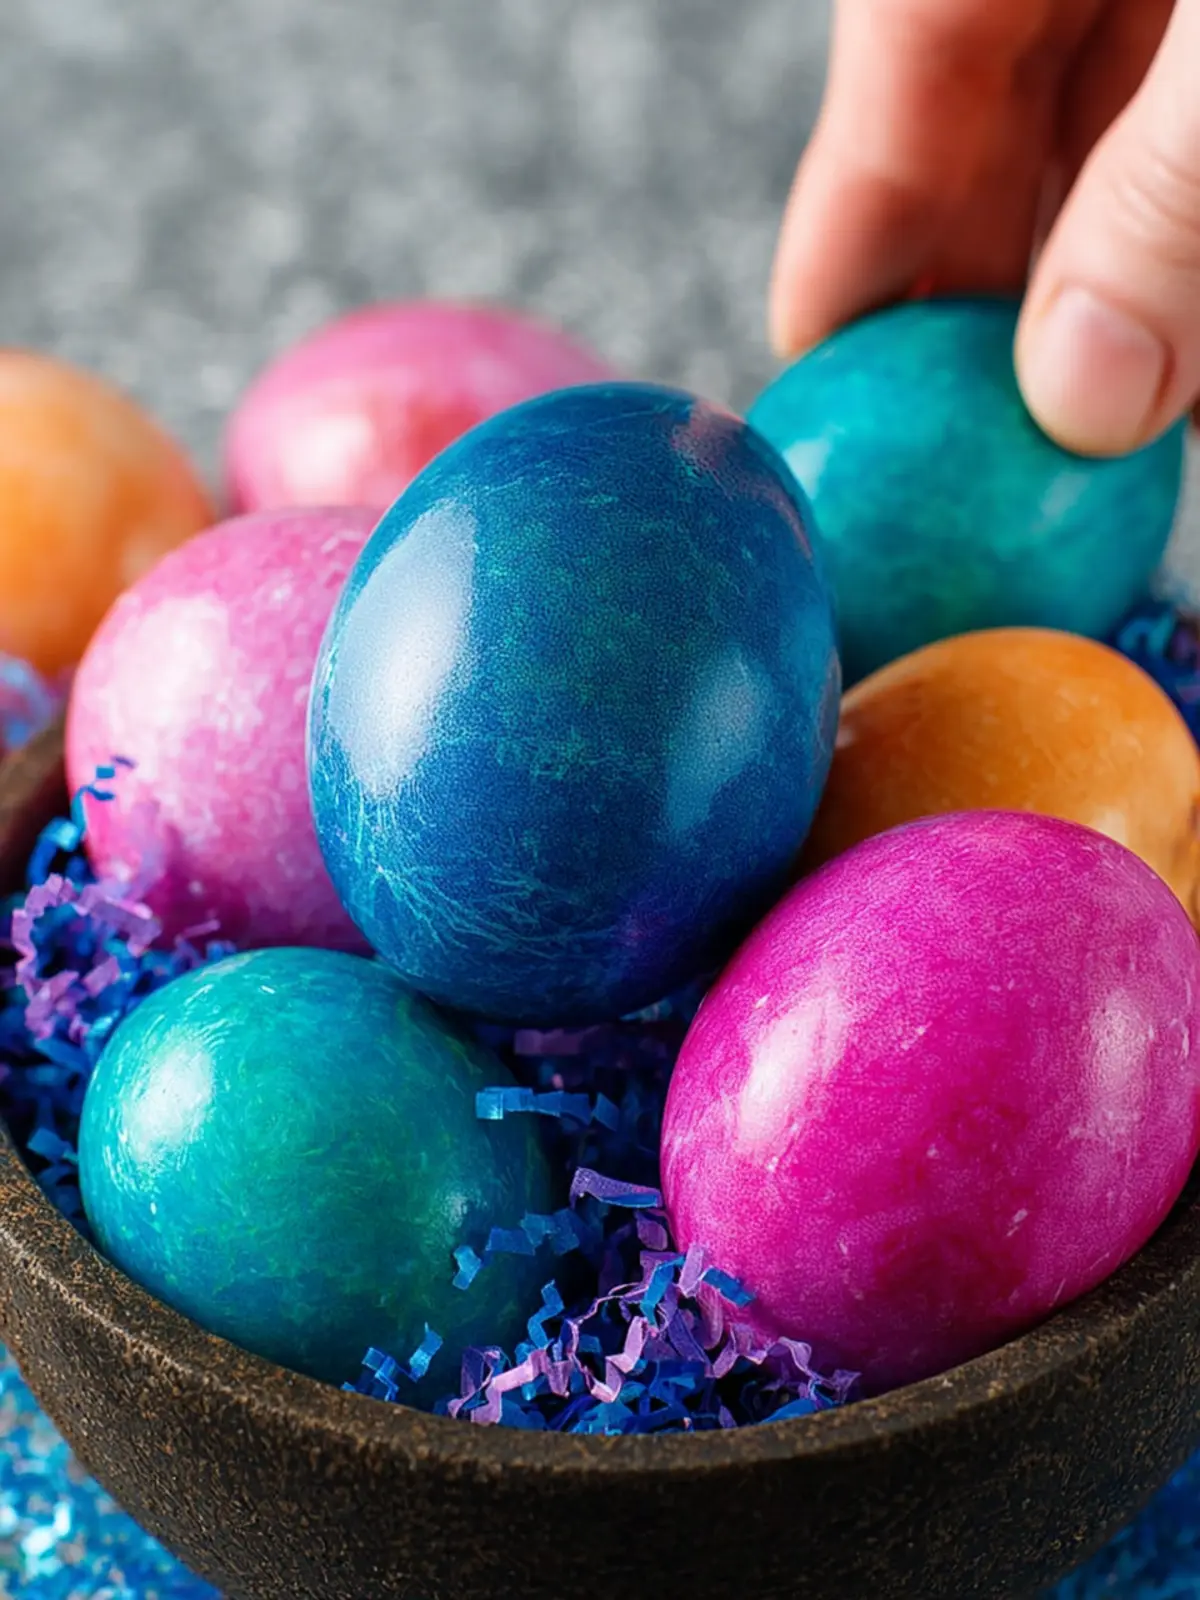
Easter eggs take on a whole new life when you explore the world of food coloring dyed Easter eggs. The simplicity of using food coloring allows for endless creative expressions. You can stick with classic hues like vibrant reds, yellows, and blues, or go for a pastel palette that evokes spring. For those seeking something unique, consider swirling multiple colors together; dipping a white egg halfway into one dye and then the other creates beautifully marbled effects. Use rubber bands or stickers to create patterns before dyeing. Once the eggs are dry, carefully remove the bands or stickers for charming designs that will leave your guests in awe.
Natural dyes alternative
If you’re interested in crafting food coloring dyed Easter eggs with an eco-friendly twist, natural dyes are a fantastic option. Items like onion skins, beet juice, or turmeric can produce stunning colors without synthetic additives. For example, red cabbage yields a lovely blue, while turmeric gives a bright yellow hue. The process can be slower than conventional dyeing, but the results are not only beautiful but also a great conversation starter. Plus, you can feel good about using ingredients that are wholesome and possibly already in your kitchen. The whole family can join in on the fun, making it a delightful Easter tradition that emphasizes creativity and sustainability.
Cooking Tips and Notes for Food Coloring Dyed Easter Eggs
Dyeing Easter eggs can be as exciting as an artist’s first brushstroke on a blank canvas, and the right techniques make all the difference in achieving those stunning, vibrant hues. Here are two essential tips to elevate your food coloring dyed Easter eggs experience.
Ensuring even coloring
To achieve a beautiful, even color on your eggs, start by using room temperature eggs. Cold eggs can cause the dye to bead up and create uneven patches. When dipping the eggs, allow them to rest in the dye bath for at least 5-10 minutes, turning gently to ensure all sides are evenly coated. If you’re mixing colors, use a separate container for each dye to prevent unwanted color blending. A gentle swirl can create unique patterns, but be careful not to overdo it!
Best practices for drying
After dyeing, it’s crucial to dry your food coloring dyed Easter eggs properly to avoid smudges and streaks. Use a clean egg carton or a drying rack to hold the eggs upright. This not only prevents them from rolling around but also minimizes the chances of fingerprints on your brightly colored surfaces. Allow the eggs to dry completely before handling or displaying them—it’s tempting to pick them up right away, but patience brings out their best look!
With these tips in mind, you’re on your way to creating vibrant and beautifully even Easter eggs that will be a feast for the eyes!
Serving Suggestions for Food Coloring Dyed Easter Eggs
The joy of food coloring dyed Easter eggs extends far beyond the moment of crafting vibrant designs. With a little creativity, these colorful treasures can brighten up your home décor and delight your taste buds, too.
Fun Décor Ideas
Transform your beautifully dyed eggs into charming decorations that can uplift any corner of your home:
- Easter Basket Centerpiece: Place your dyed eggs in a decorative basket, layering with shredded paper or grass for added texture. This makes for a whimsical centerpiece on your dining table or entryway.
- Egg Garland: String together your colorful eggs with twine to create a festive garland. Hang it on your mantel or across a doorway for that perfect holiday touch.
- Egg Place Cards: Personalize each egg for your guests by writing their names in metallic marker. It’s a thoughtful touch that doubles as a place card and a fun take-home gift!
Creative Ways to Incorporate Eggs into Dishes
Eggs aren’t just for decoration; they can also add a burst of color and nutrition to your meals:
- Deviled Eggs: Use your vibrant food coloring dyed Easter eggs as the base for scrumptious deviled eggs. The colorful shells will add an element of surprise when guests crack them open!
- Egg Salad: Create a delicious egg salad by combining chopped eggs with mayo, mustard, and fresh herbs. For a delightful visual, serve in avocado halves or on slices of crusty bread.
- Breakfast Bowls: Incorporate sliced eggs into grain bowls topped with fresh veggies, avocado, and your favorite sauce. It’s a nutritious, colorful way to start the day.
By pairing the beauty of food coloring dyed Easter eggs with practical uses, you’ll ensure their charm lasts long after Easter Sunday!
Time Breakdown for Food Coloring Dyed Easter Eggs
Creating vibrant food coloring dyed Easter eggs is not just about the fun; it’s about timing, too! The process offers a delightful way to unleash your creativity and bond with loved ones, making it both a tradition and a cherished memory.
Preparation Time
To get started with these food coloring dyed Easter eggs, you’ll need about 15 minutes to gather all your supplies and prep your workspace. This includes boiling the eggs and letting them cool.
Dyeing Time
Once your eggs are ready, the dyeing process takes about 30 minutes. You’ll want to ensure each egg has enough time in the dye to absorb those vivid colors, so a quick dip isn’t quite enough!
Total Time
When you combine preparation and dyeing, you’re looking at a total of around 45 minutes. This efficient timeline makes it easy to fit this fun activity into your day, leaving plenty of time for egg hiding or even making an Easter brunch!
Nutritional Facts for Food Coloring Dyed Easter Eggs
Dyeing eggs for Easter is a fun family tradition that can evoke memories of childhood and creativity in the kitchen. As you gather around the table to create your beautiful food coloring dyed Easter eggs, it’s also good to consider their nutritional content. After all, these colorful eggs can make for a lovely addition to your holiday table!
Calories
Each food coloring dyed Easter egg contains approximately 70 calories, primarily from the egg itself. The beauty of this tradition is that while you’re having fun decorating, you’re also enjoying a protein-packed snack.
Protein
One egg provides about 6 grams of protein, making them a solid source of this essential nutrient. Protein is crucial for maintaining muscle and energy levels, especially during the busy holiday season.
Sugars
There’s no added sugar in the eggs themselves, but keep in mind that if you decide to create egg-based dishes later, those can vary in sugar content depending on the recipe. However, the eggs themselves remain a guilt-free option!
Enjoy your colorful creations and remember that these food coloring dyed Easter eggs can be as nutritious as they are beautiful!
FAQs about Food Coloring Dyed Easter Eggs
Creating food coloring dyed Easter eggs is a delightful way to celebrate the holiday, bringing a splash of color to your festivities. As you embark on this colorful journey, you might find yourself with some questions. Let’s dive into the most frequently asked questions about these vibrant creations!
How long do dyed eggs last?
Once you’ve beautifully colored your eggs, it’s essential to store them properly. Dyed eggs can last about one week in the refrigerator if they’re kept in their shells. Just make sure to keep them in a cool, dry place and avoid leaving them out at room temperature for extended periods. If the shells are cracked, it’s best to consume those eggs within a day or two for safety.
Can I eat the eggs after dyeing them?
Absolutely! If you’re using food-safe dyes and keeping the eggs refrigerated, you can enjoy your food coloring dyed Easter eggs as tasty snacks or use them in recipes. Just ensure that the eggs were raw and cooked thoroughly before dyeing, and always store them in the fridge post-decorating to maintain their freshness.
What if I don’t have gel food coloring?
No worry! If gel food coloring isn’t available, liquid food coloring can work just as well. You can also get creative by using natural dyes from ingredients like beets for red, spinach for green, or turmeric for yellow. Simply boil these ingredients in water and use the strained liquid for dyeing. This way, you can achieve beautiful, vibrant colors without needing specialized products!
Feel free to embrace your creativity and have fun with your food coloring dyed Easter eggs!
Conclusion on Food Coloring Dyed Easter Eggs
In summary, making food coloring dyed Easter eggs is not just a fun craft; it’s a cherished tradition that brings family and friends together. The excitement of watching the colors come to life and the creativity involved can make even the busiest adults feel like kids again. Remember, whether it’s using natural dye from vegetables or the classic store-bought kits, the joy of decorating eggs creates lasting memories. So gather your supplies, dive into this colorful adventure, and let your personality shine through each uniquely dyed egg. Happy decorating!
Print
Colorful Hard-Boiled Eggs
- Total Time: 15 minutes
- Yield: 12 servings 1x
- Diet: Vegetarian
Description
A fun and colorful way to decorate hard-boiled eggs.
Ingredients
Scale
- 12 cups hard-boiled eggs
- 1 tablespoon water
- 1 teaspoon white distilled vinegar
- ½ gel food coloring
Instructions
- Fill each cup with water and vinegar.
- Add gel food dye to each cup and stir.
- Place eggs into the cups using a spoon for easy handling.
- Let sit for about 1 minute; for deeper colors, leave longer.
- Remove eggs and let dry on paper towels for at least 5 minutes.
Notes
- For best results, use fresh eggs.
- Experiment with different colors and combinations.
- Prep Time: 10 minutes
- Cook Time: 0 minutes
- Category: Dessert
- Method: Boiling
- Cuisine: American
Nutrition
- Serving Size: 1 egg
- Calories: 77
- Sugar: 0g
- Sodium: 62mg
- Fat: 5g
- Saturated Fat: 1.6g
- Unsaturated Fat: 3.4g
- Trans Fat: 0g
- Carbohydrates: 1g
- Fiber: 0g
- Protein: 6g
- Cholesterol: 186mg